Implementing Zero Trust Network Security with Cilium
Network security is one of the hardest parts of running Kubernetes in production. Many clusters still trust everything inside the network. Once a workload is inside the cluster, it can often talk to anything else. This model does not fit well with modern security needs.
Zero Trust is a security model where nothing is trusted by default. Every connection must be explicitly allowed. In Kubernetes, this means that pods can only communicate when there is a clear policy.
Cilium is a powerful CNI (Container Network Interface) that uses eBPF to provide advanced networking and security features. It fits very well with Zero Trust principles and works natively with Azure Kubernetes Service (AKS).
In this article, you will first learn the theory behind Zero Trust networking in Kubernetes and how Cilium supports it. After that, you will create an AKS cluster, install Cilium, and configure network policies step by step.
When you finish this article, you will have a new AKS cluster with Cilium as the network layer, a Zero Trust network model using default deny policies, and practical experience with CiliumNetworkPolicies.
Prerequisites
Before you begin this tutorial, you will need the following:
No existing AKS cluster is required. You will create one from scratch.
Understanding Zero Trust Networking in Kubernetes
Traditional network security often trusts the internal network. In Kubernetes, this usually means that all pods can talk to each other unless blocked.
Zero Trust changes this approach. The main ideas are:
- Never trust by default
- Always verify
- Apply least privilege
In Kubernetes networking, Zero Trust means:
- No pod-to-pod traffic is allowed by default
- All communication is explicitly defined by policy
- Identity is more important than IP addresses
Cilium supports this model by using Kubernetes identities and eBPF. This allows very fine-grained policies, better performance, and good visibility.
In the next steps, you will build this model on AKS.
Creating a Resource Group and AKS Cluster
First, create a resource group for the AKS cluster:
az group create \
  --name aks-zero-trust-rg \
  --location westeurope
Next, create a new AKS cluster with Cilium enabled as the native network dataplane.
On Azure Kubernetes Service, Cilium must be enabled during cluster creation. AKS will then install and manage Cilium automatically. This ensures the CNI is correctly integrated with Azure networking.
az aks create \
  --resource-group aks-zero-trust-rg \
  --name aks-zero-trust \
  --node-count 3 \
  --enable-managed-identity \
  --network-plugin azure \
  --network-dataplane cilium \
  --generate-ssh-keys
This command creates a three-node AKS cluster, Azure CNI for IP address management, Cilium as the networking and security dataplane, and kube-proxy replacement using eBPF.
After the cluster is ready, configure access to it using kubectl:
az aks get-credentials \
  --resource-group aks-zero-trust-rg \
  --name aks-zero-trust
Verify that the cluster is accessible:
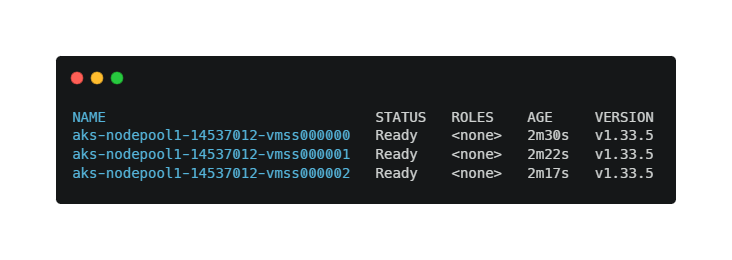
kubectl get nodesYou should see all nodes in the Ready state. You now have a working AKS cluster.
Verifying the Cilium Installation
When Cilium is enabled through AKS, it is already installed and managed by the platform. You do not need to install Cilium manually, for example by using Helm.
ℹ️ Note: On AKS, installing Cilium manually with Helm is not supported when using the native Cilium dataplane. AKS manages the lifecycle of Cilium automatically.
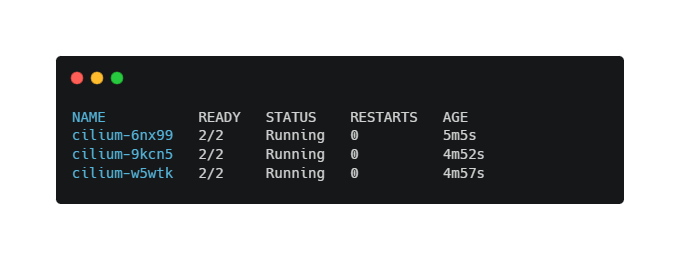
Verify that the Cilium agents are running:
kubectl get pods -n kube-system -l k8s-app=ciliumThe output should show all Cilium pods in a Running state with READY 1/1.
At this point, Cilium is fully operational and ready to enforce network security policies.
In the next step, you will deploy test applications and start applying Zero Trust network policies.
Deploying Test Applications
To test network security, deploy two simple applications in different namespaces.
Create the first namespace and deployment:
kubectl create namespace frontend[label frontend.yaml]
apiVersion: apps/v1
kind: Deployment
metadata:
name: frontend
namespace: frontend
spec:
replicas: 1
selector:
matchLabels:
app: frontend
template:
metadata:
labels:
app: frontend
spec:
containers:
- name: nginx
image: nginx
ports:
- containerPort: 80Apply the deployment:
kubectl apply -f frontend.yamlCreate the backend namespace and deployment:
kubectl create namespace backend[label backend.yaml]
apiVersion: apps/v1
kind: Deployment
metadata:
name: backend
namespace: backend
spec:
replicas: 1
selector:
matchLabels:
app: backend
template:
metadata:
labels:
app: backend
spec:
containers:
- name: nginx
image: nginx
ports:
- containerPort: 80Apply the backend deployment:
kubectl apply -f backend.yamlTo allow other workloads to reach the backend application, you need to create a Kubernetes Service. Network policies control traffic, but Services are required for service discovery and stable addressing. Without this Service, network policy tests would fail even if traffic is allowed.
Create a Service for the backend deployment:
[label backend-service.yaml]
apiVersion: v1
kind: Service
metadata:
  name: backend
  namespace: backend
spec:
  selector:
    app: backend
  ports:
    - protocol: TCP
      port: 80
      targetPort: 80
Apply the Service:
kubectl apply -f backend-service.yamlVerify that the Service is created:
kubectl get svc -n backendYou should see output similar to:
NAME      TYPE        CLUSTER-IP     PORT(S)
backend   ClusterIP   10.x.x.x        80/TCP
At this point, the backend application is reachable inside the cluster using the DNS name backend.backend.svc.cluster.local. Zero Trust is not active yet. In the next step, you will start applying Zero Trust network policies.
Applying a Default Deny Network Policy
Zero Trust starts with denying everything by default.
Create a default deny policy for the backend namespace:
[label backend-default-deny.yaml]
apiVersion: cilium.io/v2
kind: CiliumNetworkPolicy
metadata:
  name: default-deny
  namespace: backend
spec:
  endpointSelector: {}
  ingress: []
Apply the policy:
kubectl apply -f backend-default-deny.yamlNow, all incoming traffic to backend pods is blocked. You can test this by trying to connect from the frontend pod. The connection should fail.
First, make sure the frontend pod is in a Running state and has an IP address:
kubectl get pods -n frontend -o wideYou should see output similar to:

If the pod is not running, wait until it is ready before continuing.
Instead of attaching directly to the application container, use a temporary debug pod. This is a reliable and recommended approach in managed Kubernetes environments like AKS. Run the following command:
kubectl run debug \
  -n frontend \
  --image=curlimages/curl \
  -it --rm -- sh
This command starts a temporary pod with curl installed and opens an interactive shell. You should now see a prompt similar to / $.
ℹ️ Note: Using a temporary debug pod is often more reliable than attaching directly to application containers, especially in managed Kubernetes platforms.
From inside the debug pod, try to reach the backend application using Kubernetes DNS:
curl backend.backend.svc.cluster.localThe request should fail. This confirms that the default deny network policy is working correctly. Traffic to the backend pods is blocked unless explicitly allowed.
Exit the shell to remove the temporary pod, by running the exit command. The debug pod is automatically deleted.
With this test, you verified that pod-to-pod traffic is denied by default, CiliumNetworkPolicy is enforced, and Zero Trust networking is active in the cluster. In the next step, you will create a policy that explicitly allows traffic from the frontend to the backend.
Allowing Explicit Traffic with CiliumNetworkPolicy
Cilium enforces network policies based on workload identity. This identity includes both pod labels and the namespace the pod runs in. Because the frontend and backend workloads run in different namespaces, the namespace must be explicitly included in the policy. Let’s create a policy that allows frontend to talk to backend on port 80.
[label allow-frontend.yaml]
apiVersion: cilium.io/v2
kind: CiliumNetworkPolicy
metadata:
  name: allow-frontend
  namespace: backend
spec:
  endpointSelector:
    matchLabels:
      app: backend
  ingress:
    - fromEndpoints:
        - matchLabels:
            app: frontend
            k8s:io.kubernetes.pod.namespace: frontend
      toPorts:
        - ports:
            - port: "80"
              protocol: TCP
Apply the policy:
kubectl apply -f allow-frontend.yamlNow only the frontend pods can reach the backend pods on port 80. All other traffic is still blocked. This is a practical Zero Trust setup.
To verify the explicit allow policy, start a temporary debug pod with the same identity as the frontend workload:
kubectl run debug \
  -n frontend \
  --image=curlimages/curl \
  --labels="app=frontend" \
  -it --rm -- sh
From inside the pod, connect to the backend service:
curl backend.backend.svc.cluster.localThis time, the request should succeed and return the default nginx response. This confirms that only the frontend workload is allowed to access the backend.
Observing and Operating Zero Trust Networking
Cilium gives visibility into network flows. You can inspect policies and endpoints using:
kubectl get cnp -AYou can also extend this model with:
- Namespace-based isolation
- DNS-aware policies
- L7 HTTP rules
- Identity-based access control
Zero Trust is not a one-time setup. It is an operational model that evolves with your workloads.
Conclusion
In this article, you implemented Zero Trust network security for an Azure Kubernetes Service cluster using Cilium. You created an AKS cluster from scratch, installed Cilium, and applied default deny and allow policies step by step.
You now have a strong foundation for secure Kubernetes networking. From here, you can add more fine-grained L7 policies, integrate with observability tools, combine network security with identity and RBAC, or apply the same patterns to production workloads.
Zero Trust is a mindset, not only a configuration. Cilium helps you apply this mindset in a cloud-native way on AKS.
Thank you for taking the time to go through this post and making it to the end. Stay tuned, because we’ll keep continuing providing more content on topics like this in the future.
Author: Rolf Schutten
Posted on: December 30, 2025