Implementing FinOps-as-Code: Enforcing Budget Guardrails with Open-Source Policy Tools
Deploying resources is very easy nowadays. You can build powerful infrastructure, like Azure Kubernetes Service (AKS) clusters or robust databases, with just a few clicks or a single command. This is good for innovation and TTM, but it also creates a challenge: controlling cloud cost. Many organizations struggle with unexpected high bills because cost management is seen as an afterthought, not as a core part of the engineering process.
This article will show you how to solve this problem by implementing FinOps-as-Code. FinOps is the practice of bringing financial accountability to the variable spend model of the cloud. By integrating open-source tools into your Infrastructure as Code (IaC) workflows, you will configure automated guardrails to ensure that your cloud usage always aligns with your business budgets.
In this article, you will set up a system that automatically checks your resource deployments against defined budget policies before they go live on Azure. You will use open-source policy enforcement tools to define which resources are allowed, what their size limits are, and how much they are allowed to cost. When you are finished with this article, you will have a working FinOps-as-Code control gate that can prevent budget overruns and enforce financial accountability, which you could directly integrate in your GitOps or DevOps process. This approach is much more proactive than just looking at the bill after it is already too late.
The Policy Approach: Why Open Policy Agent (OPA)?
Effective cost control requires more than just monitoring your spending; you need to prevent unwanted resource deployment before it happens. This is where FinOps-as-Code comes in. It translates financial rules into technical policies that are enforced by automation.
In this article, we will use the Open Policy Agent (OPA), an open-source general-purpose policy engine. OPA is an important tool for cloud-native governance because it lets you define policy across your entire stack—from infrastructure to application code—using a high-level declarative language called Rego.
Rego: Defining Your Financial Guardrails
Rego allows you to write rules that evaluate JSON input data against a defined set of policies. For instance, a Rego policy can check:
- Cost Limits: Whether a requested Azure Virtual Machine (VM) SKU is too expensive for a specific team.
- Compliance: If all resources have the correct FinOps tags for cost allocation.
- Resource Size: If the node size of an Azure Kubernetes Service (AKS) node pool exceeds your established maximum size for development environments.
If you were integrating OPA into your CI/CD pipeline, you establish a control gate. If a deployment plan violates a budget policy, OPA rejects the plan, forcing the engineer to correct the resource configuration, thereby preventing unexpected costs.
Getting Started: Setting Up Your Environment
Now, it is time to set up your environment and install the necessary tools. We’ll establish a control gate as mentioned before.
Prerequisites
Before diving into the next steps, ensure you have the following prerequisites in place:
- You’ll need an active Azure subscription with Owner permissions to create and manage resources in Azure.
- One Ubuntu 24.04 server that you can connect to via SSH. This will serve as your control plane.
- A local development environment for editing files, such as VS Code. You will use the
nanoeditor on your remote Ubuntu machine for demonstration purposes.
Step 1 — Installing OPA and Dependencies
First, you will connect to your Ubuntu control plane and install the Open Policy Agent binary along with necessary tools like curl and jq.
First, connect to your remote server via SSH:
ssh your_username@your_server_ipNext, use curl to download the OPA binary and move it to a directory that is in your system’s PATH. This allows you to run opa commands from anywhere in your terminal:
curl -L -o opa https://github.com/open-policy-agent/opa/releases/download/v1.9.0/opa_linux_amd64Use sudo to move the downloaded file to the /usr/local/bin directory, which is typically included in the PATH, and make the file executable:
mv opa /usr/local/bin/
chmod +x /usr/local/bin/opa
Finally, check that the installation was successful by displaying the OPA version. You will also install jq, a handy tool for processing JSON data, which is useful when working with OPA:
opa versionYou will see output similar to this: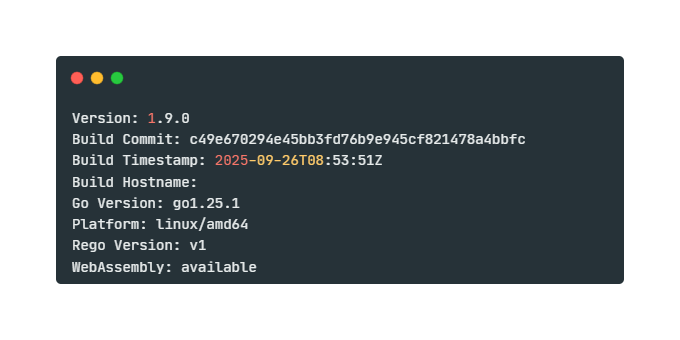
Install jq using the apt package manager:
apt update && apt install -y jqYou have now installed the policy engine (OPA) and the tools required to start defining and testing your FinOps guardrails. In the next step, you will write a policy that enforces cost constraints on your AKS cluster nodes.
Step 2 — Writing the AKS Node Size Policy in Rego
Next, you will create the policy file and write the Rego code. This policy will prevent the deployment of expensive, large node sizes (VM SKUs) for any AKS node pool that is tagged as Environment: Dev.
First, use the nano editor to create a new file named aks_cost_policy.rego:
nano aks_cost_policy.regoInside the editor, add the following Rego code. The purpose of this policy is to identify and deny VM SKUs that are larger than the allowed maximum, but only for resources with the Environment: Dev tag.
package azure.aks.cost_control

# Define a set of VM SKUs that are considered too large (and thus too expensive) for Dev environments.
# These will be denied.
denied_skus = {"Standard_D8s_v3", "Standard_D16s_v3", "Standard_E8s_v3", "Standard_E16s_v3"}

# The rule 'deny' will evaluate to true if a violation is found.
# FIX: Use 'contains msg if' for partial set rules in OPA v1.0.0+
deny contains msg if {
    # 1. Identify the input resource data (the AKS node pool definition in this case).
    resource := input.resource

    # 2. Check if the resource is an AKS node pool.
    resource.type == "Microsoft.ContainerService/managedClusters/agentPools"

    # 3. Check for the 'Environment' tag and ensure it is set to 'Dev'.
    resource.tags.Environment == "Dev"

    # 4. Extract the VM size (SKU) from the resource properties.
    sku := resource.properties.vmSize

    # 5. Check if the extracted SKU is present in the 'denied_skus' set.
    denied_skus[sku]

    # If all above conditions are met, define the denial message.
    msg := sprintf("Denial: AKS node pool in '%v' environment requested expensive SKU '%v'. Allowed maximum is Standard_D4s_v3 or smaller.", [resource.tags.Environment, sku])
}
Press CTRL+O, then ENTER to save the file, and CTRL+X to exit nano.
You have now defined a high-impact policy that directly links FinOps guardrails (expensive SKUs) to configuration data (resource tags) using Rego.
Step 3 — Simulating a Policy Violation
With your policy written, you need to test it against configuration data. We will simulate a deployment plan by creating a JSON file that represents an AKS node pool request that violates our rule.
Use nano again to create a new JSON file named violation_test.json:
nano violation_test.jsonAdd the following JSON content. Note the defined vmSize (Standard_D8s_v3) and the required Environment: Dev tag, which should trigger a denial:
{
  "resource": {
    "type": "Microsoft.ContainerService/managedClusters/agentPools",
    "tags": {
      "Environment": "Dev",
      "CostCenter": "CC101"
    },
    "properties": {
      "vmSize": "Standard_D8s_v3",
      "count": 3
    }
  }
}
Save and close the file. Now, execute the OPA test command using the eval flag:
opa eval -d aks_cost_policy.rego -i violation_test.json "data.azure.aks.cost_control.deny" | jqThe command tells OPA to:
d aks_cost_policy.rego: Load the policy file.i violation_test.json: Use the JSON file as input data."data.azure.aks.cost_control.deny": Evaluate the specificdenyrule in your policy package.| jq: Pipe the output throughjqto format the JSON result cleanly.
You will see output similar to this: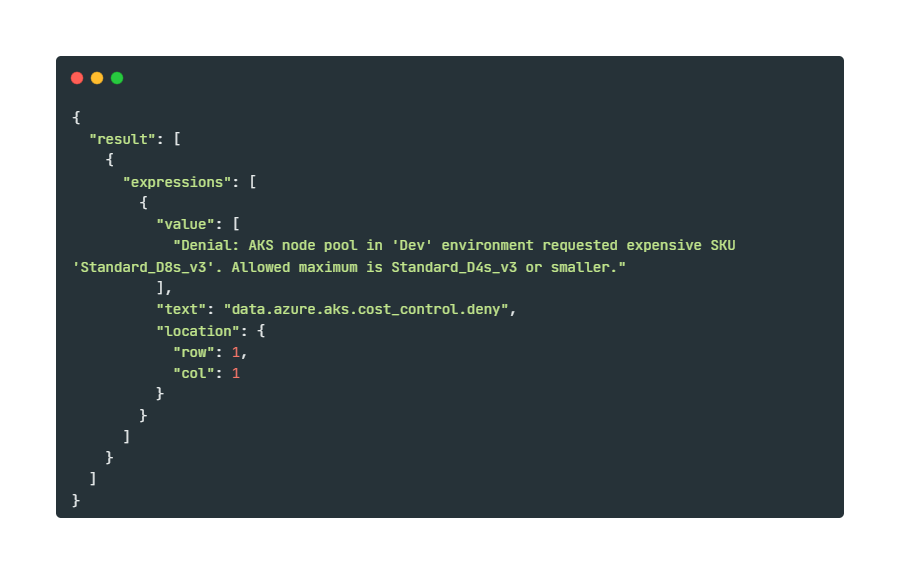
The output shows the exact denial message you defined in your Rego policy. The policy evaluation returned a denial, successfully acting as a budget guardrail!
Step 4 — Simulating a Successful Deployment
To confirm the policy only targets violations, you will now test a successful deployment. This deployment uses a smaller, more cost-effective SKU (Standard_D4s_v3), which is not in the denied_skus set.
Open the JSON file again:
nano violation_test.jsonChange the vmSize property to a permitted size:
{
  "resource": {
    "type": "Microsoft.ContainerService/managedClusters/agentPools",
    "tags": {
      "Environment": "Dev",
      "CostCenter": "CC101"
    },
    "properties": {
      "vmSize": "Standard_D4s_v3",  // <-- Changed to a permitted size
      "count": 3
    }
  }
}
Save and close the file, and re-run the OPA evaluation command:
opa eval -d aks_cost_policy.rego -i violation_test.json "data.azure.aks.cost_control.deny" | jqThis time, the output will be an empty array, which indicates a successful compliance check: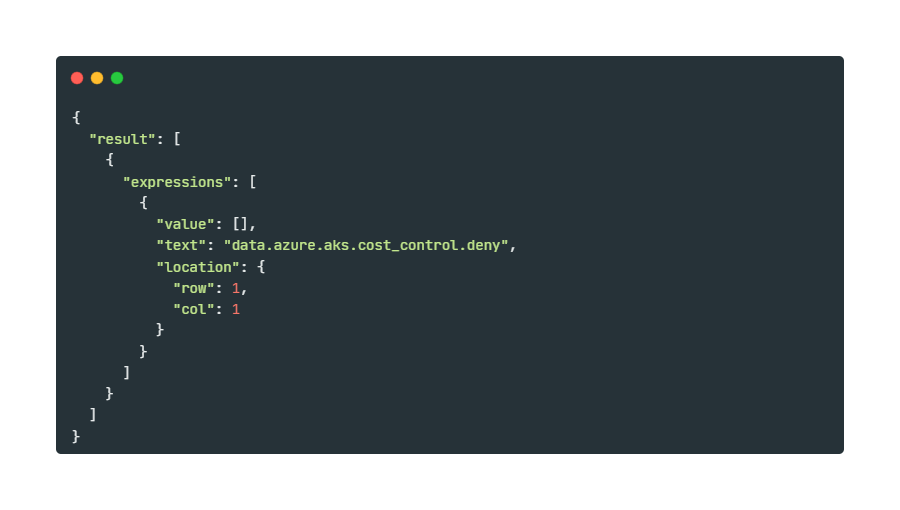
The policy did not return any denial messages, proving that the AKS node pool configuration is compliant with your FinOps rules.
Closing Words
In this article, you configured and tested an important component of FinOps-as-Code on Azure. We successfully demonstrated how to define financial guardrails using the Open Policy Agent (OPA) and its Rego language. By creating a policy that restricts expensive AKS node sizes based on the resource tag, we have established an automated, proactive gate that enforces budget compliance directly within your infrastructure deployment process.
If you were integrating this policy check into your CI/CD or GitOps pipeline (e.g., as part of a Terraform Plan validation step), you can ensure that cost control is a mandatory, automated step for every Azure resource deployed. It’ll move you beyond simple cost monitoring, towards true cost prevention.
To learn more about FinOps and how it can benefit your specific scenarios, I recommend exploring the following resources:
Thank you for taking the time to go through this post and making it to the end. Stay tuned, because we’ll keep continuing providing more content on topics like this in the future.
Author: Rolf Schutten
Posted on: October 27, 2025